Showing posts with label dekens. Show all posts

Sunday, April 24, 2022

Granny Square Blanket


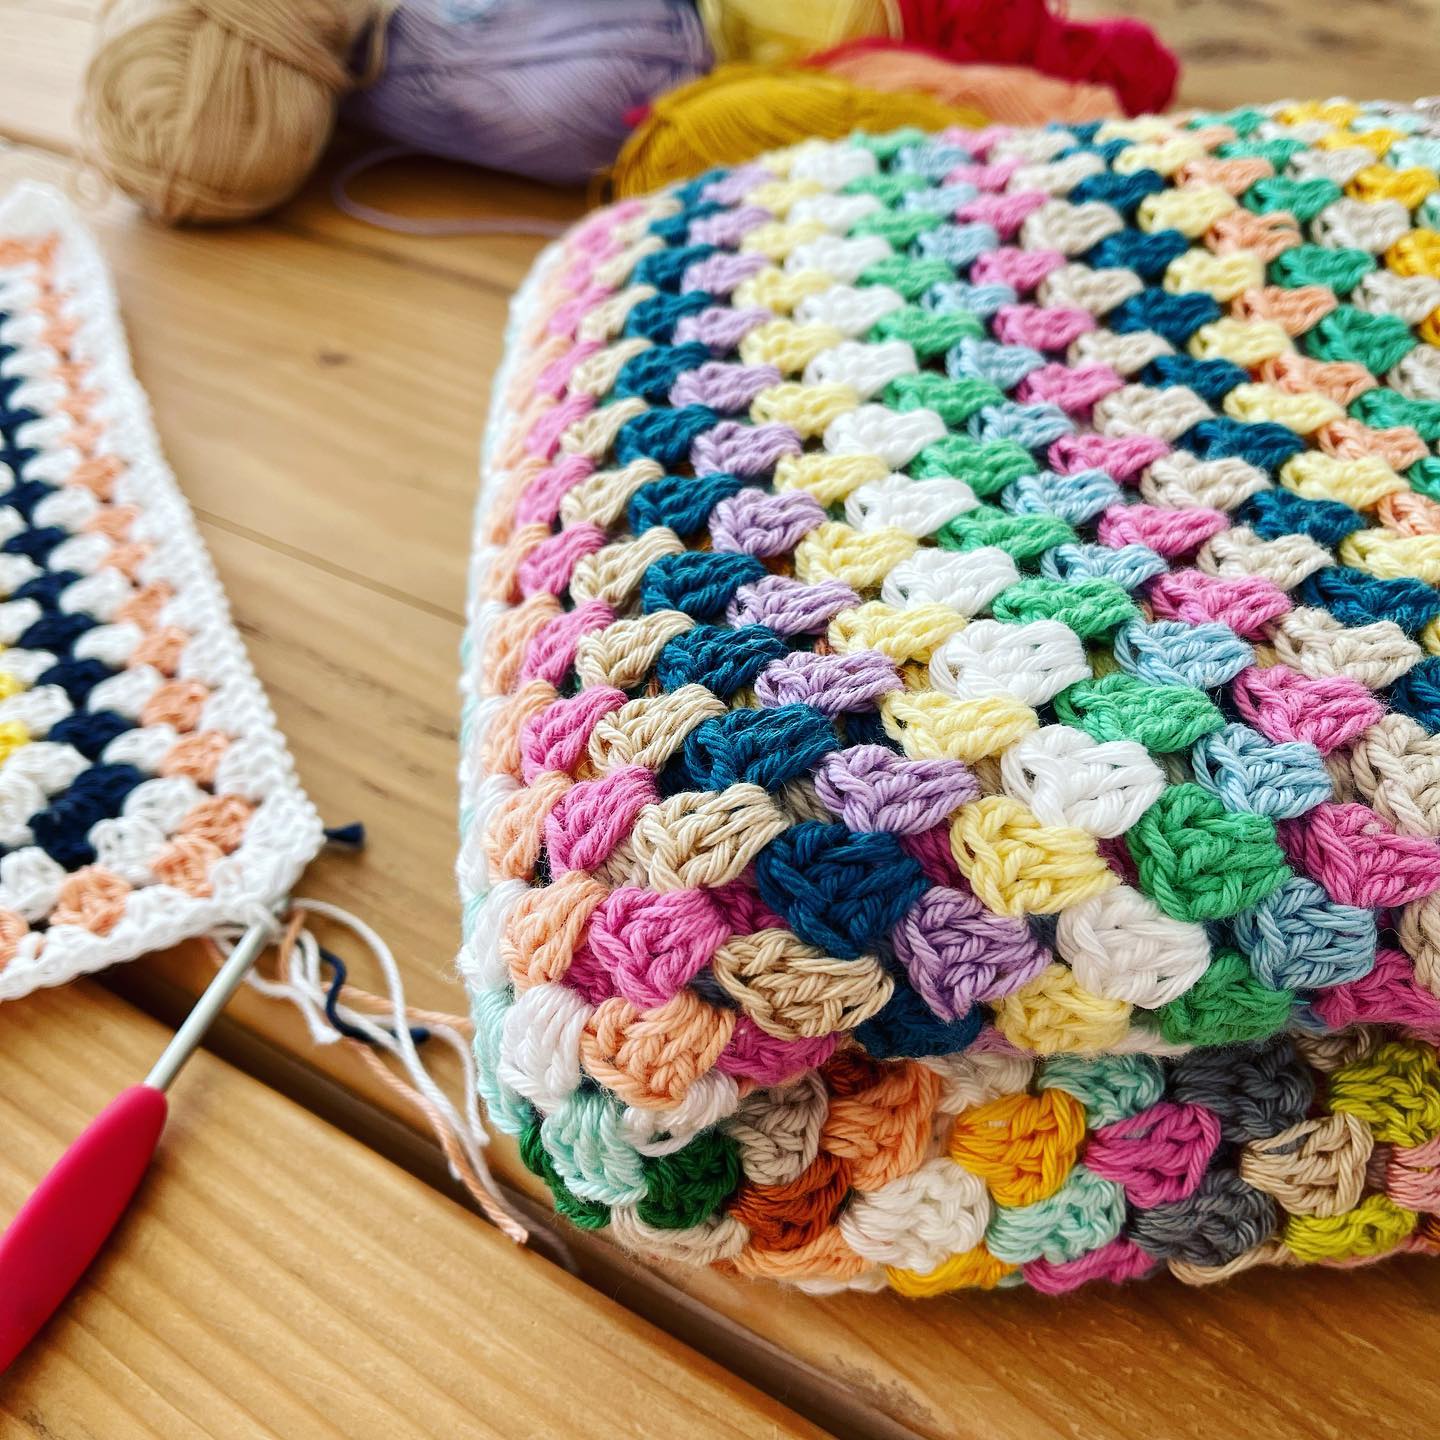
Ik weet nog dat ik granny squares helemaal niet mooi vond toen ik net haakte. Ik vond ze oubollig en kon me niet voorstellen dat ik ze ooit zou haken. Maar zo zie je maar dat het soms raar kan lopen! Want ik haakte de laatste paar maanden alleen maar granny squares. Het fijne ervan is dat het gewoon zo lekker weghaakt. Je hoeft niet na te denken, je hoeft niet eens te kijken (tenminste, ik niet). Zo'n deken vind ik  gewoon een heel fijn project waar ik eindeloos mee door kan gaan. Als ik een granny square post op Facebook of Instagram krijg ik vaak de vraag wat er van ga maken. Maar dat weet ik van tevoren eigenlijk nooit. Ik begin en ik zie wel waar het schip strandt. Als ik na een paar rijen geen zin meer heb maak ik er een kussen van. En heb ik geen zin om te te stoppen, dan wordt het een deken. En soms verdwijnt die dan ook voor maanden in de kast totdat ik weer zin heb om er mee verder te gaan. Dat gebeurde ook met deze deken. Hij ligt echt al heel lang in de kast, maar ik ben er nu weer mee verder gegaan en ik werk er met plezier aan. Ik haak deze deken met Phildar Phil Coton 3 en een haaknaald 4mm. Ik wens je een fijne zondag!

I remember not liking granny squares at all when I was just started crocheting. I thought they were old fashioned and couldn't imagine ever crocheting them. But as you can see, sometimes things can change totally! For the last few months I've only been crocheting granny squares. The nice thing about it is that it's just so easy. You don't have to think, you don't even have to look (at least, I don't). I just find a blanket like this a really nice project that I can work on endlessly. When I post a granny square on Facebook or Instagram I often get asked what I am going to make of it. But I never really know beforehand. I start and just see what happens. If I don't feel like it after a few rows I make a pillow out of it. And if I don't feel like stopping, then it becomes a blanket. And sometimes it disappears in the closet for months until I feel like continuing with it. That also happened with this blanket. It's been in the closet for a really long time, but I've started working on it again and I'm enjoying it. I make this blanket with Phildar Phil Coton 3 and a 4mm crochet hook. I wish you a nice Sunday!

Sunday, December 5, 2021

Moss Stitch Blanket


Ik ben een nieuwe deken aan het haken. Ik ben begonnen met het opzetten van 150 lossen, zoals aangegeven in dit patroon. De Moss Stitch is echt een hele mooie steek, maar het gaat niet echt snel dus het zal nog wel een hele klus worden om deze deken af te krijgen. Maar terwijl ik haak zie ik hem mooier en groter worden, dus dat motiveert wel om door te gaan. Ik haak niet helemaal volgens het patroon. Wel de steken, maar niet de hoeveelheid toeren die in zwart gehaakt moeten worden. Daarom zal hij er iets anders uit gaan zien dan de deken van Daisy Farm Crafts. Ik haak de deken met Drops Paris katoen (kleur nummer 17, gebroken wit en kleur nummer 15, zwart) en een haaknaald 6mm. Ik was begonnen met een 5mm, maar daarmee werd de steek toch een beetje te strak en de deken niet zo soepel. Maar dit gaat perfect zo, dus ik ga nog even lekker verder. Ik wens je een fijne dag!

I am crocheting a new blanket. I started with 150 chain stitches, as instructed in this pattern. The Moss Stitch is a really nice stitch, but it doesn't go very fast so it will be a lot of work to finish this blanket. But as I crochet I see it getting more beautiful and bigger, so that does motivate me to keep going. I am not quite following the pattern. I am making the same stitches, but I've changed the number of rows that need to be crocheted in black. Therefore, it will look a little different than the blanket from Daisy Farm Crafts. I am crocheting the blanket with Drops Paris cotton (color number 17, off white and color number 15, black) and a 6mm crochet hook. I had started with a 5mm, but that made the stitch a little too tight and the blanket not as soft as it should be. But this is going perfectly, so I will continue for a while. I wish you a nice day!

Sunday, March 14, 2021

Granny Blanket


Ik ben al een tijdje bezig met een nieuwe Granny Blanket. Het fijne aan zo'n deken is dat ik het bijna met mijn ogen dicht kan haken. En je kunt er zo heerlijk al je restjes mee op haken. Als ik zo'n deken haak dan maak ik altijd eerst een groot vierkant. Daarna ga ik aan één zijde verder met het Granny Stripe patroon. Zo krijg je een grote rechthoek. Als die rechthoek de juiste afmetingen heeft ga ik verder met de rand. Het is een hele simpele manier maar het haakt zo fijn weg. Ondertussen denk ik al weer na over een volgende deken. Ik zou wel eens eentje willen haken met veel meer wit. Nou ja, dat kan vast op mijn wensenlijstje voor volgende projecten. Ik wens je een fijne zondag!

I've been working on a new Granny Blanket for a while now. The nice thing about such a blanket is that I can crochet it almost with my eyes closed. And it is so nice to be able to crochet with just scraps of yarn. When I crochet a blanket like this I always make a large square first. Then I continue on one side with the Granny Stripe pattern. This way you get a large rectangle. When that rectangle has the right dimensions I continue with the edging. It is a very simple way to make a blanket but it is so nice to do. Meanwhile I am already thinking about my next blanket. I would like to crochet one with much more white. Well, that can be put on my wish list for next projects. Have a nice Sunday!

Sunday, January 24, 2021

Crochet Mustard Yellow Blanket


Dit garen (Paintbox Yarns Simply Chunky) heb ik al zo lang liggen en ik heb er al verschillende dingen van geprobeerd te maken, maar het werd telkens net niet wat ik wilde. Ik haakte bijvoorbeeld een deel van deze deken uit het boek Cocoon. En daarna begon ik weer wat anders maar ook dat pakte anders uit dan ik had verwacht. Toen ben ik maar gewoon begonnen met een grote granny square. En dat haakte zo lekker weg met een haaknaald 8mm dat er al gauw een fijne deken begon te ontstaan. Toen het vierkant groot genoeg was ben ik aan een kant verder gegaan met het granny stripe patroon. Dan blijft de steek hetzelfde maar op die manier maak je de deken een rechthoek en dus langer. Aan de hoeken wil ik de pompons vastmaken. Nu alleen nog de rand en dan is het klaar en kan ik verder met weer wat anders.

I've had this yarn (Paintbox Yarns Simply Chunky) lying around for so long and I've tried to make several things from it, but each time it just didn't turn out the way I wanted. For example, I crocheted part of this blanket from the book Cocoon. And then I started something else but it still wasn't what I expected. Then I just started with a large granny square. And that worked so well with an 8mm crochet hook that soon a nice blanket began to form. When the square was big enough I continued with the granny stripe pattern on one side. Then the stitch remains the same but that way you make the blanket a rectangle and thus longer. At the corners I want to attach the pompoms. Now all I need to make is the edging and then it is finished and I can continue with something else.

Sunday, December 20, 2020

Cocoon!


Ik kreeg het boek Cocoon! Een prachtig boek waar ik eigenlijk meteen mee aan de slag wilde. In het boek vind je patronen van (woon)accessoires, zoals dekens, een kussen en mooi sjaals. Mijn oog viel meteen op de deken waarvan het patroon ongeveer halverwege het boek staat. Ik had niet de juiste materialen in huis maar wilde wel graag beginnen, dus ik pakte een van mijn bollen Paintbox Yarns Simply Chunky en een haaknaald 6mm zoals voorgeschreven op de bol. Er staat in het patroon dat je lekker losjes moet haken. Nu ben ik eerder geneigd om te strak te haken, maar ik deed mijn best en ging aan de slag. Ik kwam er al snel achter dat het geen gemakkelijke steek is. Toen ik twee toeren op weg was kwam ik tot de conclusie dat ik iets verkeerd deed. En eigenlijk werd het toch te strak, ook al deed ik zo mijn best. Dus er zat niets anders op dan opnieuw beginnen. Ik als ik dan toch helemaal opnieuw begon, kon ik net zo goed een grotere haaknaald pakken. Dus ik begon weer van voren af aan maar dan met een grotere haaknaald (7mm). Ik zag al gauw waar ik de mist in was gegaan, ik had gewoon het patroon niet goed gevolgd. Nu ging het wel goed en het begon er echt zo mooi uit te zien! Bij ongeveer de derde toer zag ik wel dat ik eigenlijk een nóg grotere haaknaald had moeten pakken. Dan was het nog losser geworden, iets wat (zoals al bij het patroon stond) beter had gepast bij een deken, want nu werd mijn deken een beetje stug. Maar ik genoot wel van wat zich onder mijn ogen ontvouwde: een prachtig stuk haakwerk! Gaandeweg zag ik dat ik niet genoeg garen zou hebben om de deken af te maken, dus ik heb uiteindelijk besloten alles uit te halen en de deken nog een keer te maken maar dan met het garen en de haaknaald (15mm) zoals in het boek genoemd wordt. Het uithalen ga ik echt met pijn in mijn hart doen, want het wordt zo mooi. Maar ik weet dat het straks nóg mooier gaat worden, dat is dan een beetje een troost. De rest van het boek is trouwens ook echt prachtig. Er staat nog een kussen in wat ik graag wil maken en sowieso is het kleurgebruik in het boek echt een inspiratie op zich. Het boek is ook gewoon een prachtig hebbeding voor op tafel, het ziet er zo mooi uit. Dus zoek je nog een mooi boek voor Kerst? Vraag ernaar bij je lokale wolwinkel. Ik wens je een fijne dag vandaag!

I got the book Cocoon! A beautiful book that I really wanted to get started with right away. In the book you will find patterns of (home) accessories, such as blankets, a pillow and beautiful scarves. My eye immediately fell on the blanket of which the pattern is about halfway the book. I didn't have the right materials but I really wanted to start working on it, so I took one of my balls of Paintbox Yarns Simply Chunky and a crochet hook 6mm as prescribed on the ball of yarn. It says in the pattern that you have to crochet loosely. Now I know that I always crochet a bit too tight, but I did my best not to do that this time. I soon found out that it is not an easy stitch to make. When I was in the 2nd row I came to the conclusion that I was doing something wrong. And actually it became too tight, even though I tried so hard. So there was nothing to do but start all over again. And I thought, if I have to start all over again, I might as well get a bigger crochet hook. So I started again from the start but with a bigger crochet hook (7mm). I soon discovered where I had gone wrong, I just hadn't followed the pattern very well. So I did what the pattern said and it really started to look so beautiful! When I was halfway the third row I saw that I should have taken an even bigger crochet hook. Then it would have become even looser, something that (as already stated in the pattern) would have fitted better with a blanket, because now my blanket became a bit stiff. But I did enjoy what unfolded under my eyes: a beautiful piece of crochet work! Gradually I saw that I wouldn't have enough yarn to finish the blanket, so I finally decided to unravel and make the blanket again but with the yarn and the crochet hook (15mm) as mentioned in the book. I know I'll do the unravelling with pain in my heart, because it is going to be so beautiful. But I know it is going to be even more beautiful next time, that's a bit of consolation. The rest of the book is also really beautiful. There's another pillow in what I'd like to make and als the use of color in the book is really an inspiration in itself. It is also a lovely book to just put on your table, the design is so pretty. So are you looking for a nice book for Christmas? Ask at your local wool store (the book is only available in Dutch right now). Have a happy day!

Wednesday, November 18, 2020

Blue Violets Blanket


Dit is de Blue Violets Blanket, een deken die ik ontwierp voor mijn boek Crochet in the City dat in 2018 uitkwam. Het lijkt al weer zo lang geleden dat dat boek van de drukker kwam, maar ik kan me nog goed herinneren dat ik aan deze deken werkte. Hoe groter hij werd hoe blijer ik werd. Ik vind het nog steeds een van de mooiste projecten uit het boek. Ik ben nu bezig met de patroontjes uit het boek toe te voegen aan mijn Etsy-shop. Dat is best veel werk en op dit moment is dan ook alleen de Engelse versie beschikbaar. Je kunt die hier bestellen. Het boek is natuurlijk ook nog steeds verkrijgbaar. Klik hier om het in te kijken. Ik wens je een fijne dag toe!

This is the Blue Violets Blanket, a blanket I designed for my book Crochet in the City that was released in 2018. It seems like such a long time ago that the book was published, but I can still clearly remember when I worked on this blanket. The bigger it got, the happier I got. I still think it's one of the most beautiful projects in the book. I'm now working on adding the patterns from the book to my Etsy-shop. That's quite a lot of work and at the moment only the English version of this pattern is available. You can order it here. The book is also still available. Click here to have a look at it. I wish you a nice day!

Sunday, November 8, 2020

Katia Seacell Cotton


Een tijd geleden haakte ik deze deken en dit kussen van Katia Seacell Cotton. Het was zo'n leuk project om te maken. Ik gebruikte 1 bol van elke kleur en een haaknaald 4mm. Het garen is zo fijn en zacht, ik ga het zeker nog een keer gebruiken voor een andere deken. Het patroon van de deken kun je hier op Ravelry vinden. Het kussen is eigenlijk een heel simpel gestreept patroontje van halve stokjes. Het formaat van het kussen is afhankelijk van hoeveel garen je over hebt na het haken van de deken. Je kunt natuurlijk ook extra bolletjes kopen, maar ik vind het altijd leuk om te kijken wat ik allemaal kan maken met 1 bol. Meer patronen van dekens vind je hier, meer patronen van kussens vind je hier. Ik wens je een fijne zondag!

A while ago I crocheted this blanket and pillow from Katia Seacell Cotton. It was such a nice project to make. I used 1 ball of each color and a crochet hook size 4mm. The yarn is so lovely and soft, I will definitely use it again for another blanket. The pattern of the blanket can be found here on Ravelry. The pillow is actually a very simple striped pattern of half double crochet stitches (US terms). The size of the pillow depends on how much yarn you have left after crocheting the blanket. Of course you can also buy extra balls, but I always like to see what I can make with 1 ball. More blanket patterns are here, more cushion patterns are here. I wish you a happy Sunday!

Sunday, July 12, 2020

Sunburst Cushion - Free Pattern


Dit kussen ligt al heel lang onafgemaakt op mijn bureau. Ik moest eigenlijk alleen de draden nog wegwerken, maar dat kan zo'n klusje zijn wat ik telkens voor me uit schuif. Daarnet heb ik het gedaan en ik was eigenlijk in een kwartier klaar. Dus waarom het nou twee maanden heeft moeten duren... Het patroon van de granny square vind je hieronder, onder de tweede foto. Het is hetzelfde patroon als dat van deze deken. Voor het haken van een hoes van ongeveer 37 cm breed heb ik negen squares gehaakt die ik ook meteen aan elkaar heb gehaakt volgens deze methode. Daarna heb je een groot vierkant van negen squares, daar haak je nog twee toeren stokjes omheen. Die toeren bestaan telkens uit twee stokjes met daartussen een losse. Als je klaar bent naai je het kussen rondom dicht op deze manier. Het kussen bestaat uit twee kanten zoals je ziet, ik gebruikte voor elke kant andere kleuren maar dat hoeft natuurlijk niet. Ik haakte dit keer met Paintbox Cotton Aran en een haaknaald 4.5mm. Veel haakplezier gewenst!

This cushion was on my desk for a long time because it was not finished yet. All I needed to do is work away the yarn ends, but that can be a job that I'm so not looking forward too. So I finally did it today, and I was ready in 15 minutes. I really don't know why this had to to wait for two months... 
The pattern (US terms) of the granny squares is below the pictures and below the Dutch pattern. It is the same pattern as the squares of this blanket. You have to make 9 squares for a cushion insert of 37 cm. You will join the squares as you go using this method (this is a Dutch blog, a similar tutorial in English is here). When you have a square of nine squares, you will add another two rounds of double crochet stitches. Those rounds are made of 2 double crochet stitches with 1 slip stitch in between every set. Make a front and a back and close the pillow insert by sewing the squares using this method. I used different colours for each side, but you can use any colour you like. I made this pillow insert with Paintbox Cotton Aran and a crochet hook size 4.5mm. Happy crocheting!


Patroon Sunburst Square

Clustersteek --> de clustersteek is gemaakt van 2 stokjes waarbij je telkens de laatste stap overslaat. Je hebt na het tweede stokje 3 lussen op je naald, sla de draad om je naald en haal de draad door alle drie de lussen tegelijk. Als je nog nooit een clustersteek hebt gehaakt is hier een stap voor stap uitleg:
Sla de draad om de naald, steek de naald in de volgende steek, sla de draad om de naald, haal de draad omhoog (je hebt nu drie steken op de naald), sla de draad weer om de naald en trek de draad door 2 van de 3 steken op de naald (je hebt nu 2 steken op je naald). Sla de draad opnieuw om de naald, steek de naald in dezelfde steek, sla de draad om de naald en haal de draad omhoog (je hebt nu vier steken op je naald), sla de draad om de naald, haal de naald door twee lussen op je naald, sla de draad om de naald, haal de draad door de laatste drie lossen op de naald.

1. Maak een magische ring, haak 2 lossen (tellen niet als een half stokje). Haak 16 halve stokjes in de ring, haak een halve vaste in het eerste halve stokje. Weet je niet hoe je een magische ring haakt? Klik dan hier. Wil je liever niet met een magische ring werken? Haak dan in plaats daarvan 3 lossen en haak de 16 halve stokjes in de eerste losse die je haakte.
2. Haak 2 lossen, haak 1 stokje, haak 1 losse. 
* Haak in de volgende steek een clustersteek, haak 1 losse. * 
Herhaal wat tussen * staat rondom. Haak na de laatste losse een halve vaste in het tweede stokje dat je haakte aan het begin van deze toer (dus niet bovenin de twee lossen, maar in het stokje daarnaast). Wissel daarbij van kleur.
3. Haak 1 halve vaste in de volgende 1-losse-opening. Haak 3 lossen (telt als 1 stokje), haak 1 stokje in dezelfde opening, haak 1 losse. Haak 2 stokjes in de volgende 1-losse-opening, haak 1 losse.
De volgende 1-losse-opening is een hoek: haak 2 stokjes, 2 lossen, 2 stokjes in die 1-losse-opening.
* Haak dan 1 losse en in de volgende 1-losse-opening weer 2 stokjes. * Herhaal de vorige stap nog een keer en haak dan weer een hoek. Blijf dit alles herhalen tot je rond bent. Haak dan na de laatste losse een halve vaste bovenin de derde losse (het eerste stokje dus) die je haakte aan het begin van deze toer. Haak dan een halve vaste in het volgende stokje en in de daarnaast gelegen 1-losse-opening.
4. Herhaal nu de vorige toer door telkens in de 1-losse-openingen twee stokjes te haken met daartussen 1 losse. De hoeken zijn ook telkens hetzelfde: 2 stokjes, 2 lossen, 2 stokjes.
5. In deze toer doe je weer hetzelfde, alleen ga je nu de squares aan elkaar haken. Zie boven voor een link naar een duidelijke uitleg hoe dat moet.

Pattern Sunburst Square

Cluster stitch --> the cluster stitch is two DC's of which you skip the last step. Then do yarn over and pull through the last three loops on your hook. If you have never made a cluster stitch, here's how to do it step by step:
Yarn over hook, yarn in next stitch, yarn over, pull yarn up (you now have 3 loops on your hook), yarn over, pull yarn through 2 of the 3 loops on you hook (you now have 2 loops on you hook). Yarn over again, place hook in the same stitch as before, yarn over, pull yarn up (you now have 4 loops on your hook), yarn over, pull yarn through 2 loops on your hook, yarn over, pull yarn through 3 loops on your hook.

1. Make a magic ring, chain 2 (they don't count as a HDC). Make 16 HDC in the ring, make a slip stitch in the first HDC you made.
Note: if you don't know how to make a magic ring, click here. If you don't want to use a magic ring, do the following: Chain 3, make 16 HDC in the first chain you made.
2. Chain 2, make 1 DC, chain 1. 
* Make 1 clusterstitch in the next stitch, chain 1. * 
Repeat around what's in between *. After the last chain stitch: make 1 slip stitch in the first DC you made at the beginning of this row (so not in the second chain, but in the DC next to it). Change colour while doing so.
3. Make 1 slip stitch in the next chain-1-space. Chain 3 (count as the first DC), make 1 DC in the same space, chain 1. Make 2 DC in the next chain-1-space, chain 1.
The next chain-1-space is a corner: make 2 DC, chain 2, make 2 DC in that chain-1-space.
* Make 1 chain stitch, make 2 DC in the next chain-1-space.* Repeat what's in between * once.
Make another corner. Repeat the previous steps around, and end this row with a slip stitch in the third chain (so the first DC) that you made at the beginning of this row. Make another slip stitch in the next DC and in the next chain-1-space.
4. Repeat the previous row by making 2 DC's in every chain-1-space with 1 slip stitch in between. The corners are the same: 2 DC, chain 2, 2 DC in the same space.
5. Make another row just like row 4 but this time you start joining the squares. See above for a link to a clear tutorial.


Wednesday, May 27, 2020

Free patterns


Had je het patroontje van de gehaakte hartjes gedownload? Dan heb je op de laatste pagina misschien de foto gezien met deze patroontjes. Dit zijn allemaal gratis patroontjes. Drie ervan zijn door mij gemaakt en eentje is een ontwerp van DutchLittleDots. Als je op ananas, theelichthouder, appel of deken klikt kom je bij de blogberichten met (link naar) de patroontjes uit. Veel plezier!

Did you download the crochet hearts pattern? Then maybe you noticed the picture of these patterns on the last page. These are all free patterns. Three of them are my own designs, one of them is designed by DutchLittleDots. If you click pineapple, tealight cover, apple or blanket you will go to the blog post with the (links to) the free patterns. Enjoy!

Wednesday, April 29, 2020

Bobble Blanket


Ik ben begonnen aan een dekentje met bobbelsteken. Misschien vind je het leuk om mee te haken? Het patroon is heel simpel. Mijn deken is ongeveer 63 centimeter breed. Ik haak met een haaknaald 4.5mm en Paintbox Yarns Cotton DK. Voor je begintoer haak je een veelvoud van 5 + 2 lossen. In de derde losse vanaf je naald haak je een stokje. Daarna haak je in alle overige lossen ook een stokje. Als je aan het einde bent keer je je werk. Haak dan 3 lossen, deze tellen als het eerste stokje. Vervolgens haak je in de volgende steek een stokje, en daarna in alle andere steken totdat je aan het eind van de toer gekomen bent. Dan keer je je werk weer en begint weer met de drie lossen gevolgd door alleen maar stokjes. De eerste toeren (in de kleur geel bij mij) heb ik gewoon alleen maar stokjes gehaakt. Bij mij bestaat de kleur geel uit 6 toeren met stokjes. Daarna wisselde ik van kleur naar blauw. Met de blauwe kleur haakte ik drie toeren met stokjes. De vierde toer is mijn rij met bobbels, die haak je zo: haak als je gekeerd bent 3 lossen, haak in de volgende 6 steken een stokje. * Haak een bobbelsteek van 5 stokjes (bij een bobbelsteek sla je van elk stokje de laatste stap over, na het vijfde stokje haal je de draad door alle lussen op je naald), haak daarna 4 stokjes. * Herhaal wat tussen * staat totdat je nog zeven steken over hebt. Haak in elk van die zeven steken een stokje. Let op: het laatste stokje gaat in de derde losse van het eerste stokje van de vorige toer. Daarna haak je weer drie toeren met stokjes en aan het eind wissel je van kleur naar de volgende toer (ik wisselde van kleur naar oranje). Zo ga je verder totdat je deken lang genoeg is. Ik zal de komende tijd laten zien hoe mijn deken langzaam vordert. En uiteindelijk zal ik je ook laten zien wat voor rand ik er omheen ga haken. Veel plezier als je mee gaat haken!

I started working on a blanket with bobble stitches. Perhaps you would like to join me? The pattern is really simple. My blanket is approximately 63cm wide. I'm using a crochet hook size 4.5mm and Paintbox Yarns Cotton DK. Start with a row of chain stitches of a multiple of 5 + 2 chains. Make a double crochet (US terms) in the 3rd chain from your hook. Make a double crochet in every other chain. Turn your work after the last double crochet. Chain 3 (these 3 count as the first double crochet), make 1 double crochet in the next stitch and in every other stitch of the previous row until you've reached the end of the row. Turn your work, make 3 chains again and continue this row with just double crochet stitches. The first few rows (in yellow) are just double crochet stitches. In total I made 6 rows of double crochet stitches in yellow. At the end of the sixth row I changed color to blue. I continued in blue and made 3 rows of double crochet stitches. The fourth row is my row with bobbles. To make this row do the following: chain 3, make 1 double crochet in the next six stitches. * Make 1 bobble stitch of 5 double crochet (if you make a bobble stitch you skip the last step of every double crochet, after the fifth double crochet you pull the yarn through all loops on your hook), after the first bobble make 4 double crochet. * Repeat what's in between * until you have 7 stitches left. Make 1 double crochet in each of those seven stitches. The last/seventh stitch is in the 3rd chain of the first double crochet of the previous row. Continue to make three more rows with double crochet stitches and change color again to a new color (I changed to orange). Continue until your blanket is long enough. I'll show you how my blanket is growing in the next few weeks. And of course I'll show you what edging I'll make once my blanket is long enough. I hope you enjoy this pattern if you decide to make it!

Tuesday, January 14, 2020

Grandma's Bedspread


Wat een mooi sprei is dit toch. Het is een sprei met een bijzonder verhaal, dat kun je hier lezen op de blog van EchtStudio. Het patroon kun je hier gratis downloaden in de webwinkel van EchtStudio. Je hebt voor dit sprei wel een flink aantal bollen katoen nodig, maar dan heb je ook wel echt iets bijzonders wat jaren mee kan. Je kunt dit sprei natuurlijk ook in een vrolijk kleurtje haken. Ik ben benieuwd of iemand dat al eens gedaan heeft.

What a gorgeous bedspread this is. And it is a bedspread with a very touching story, you can read it here on the blog of EchtStudio. The pattern is available as a free download here (in Dutch only) in the webshop of EchtStudio. For this bedspread you'll need a lot of cotton, but it is certainly worth it. I wonder if anyone made this bedspread in a color like pink or blue? I'd love to hear it if that's the case.

Wednesday, January 8, 2020

Blue Violets Blanket


Zo leuk, al die verjaardagswensen die ik kreeg vanwege het feit dat mijn blog tien jaar bestaat. Aan de giveaway van mijn boek Crochet in the City werd dan ook massaal meegedaan. De winnaars zijn inmiddels bekend: Sylvia Hummel, Jenneke van Maurik en Daphne Mols hebben een exemplaar van mijn boek gewonnen. Op de foto zie je de Blue Violets Blanket. Dat is een van de patronen uit het boek. Het is zelf een van mijn favoriete patronen uit het boek omdat ik het blauw zo mooi vind combineren met de vrolijke bloemen. Ik haakte deze deken met Phildar Phil Coton 3. Wil je meer lezen over mijn boek? Kijk dan hier. Als je in Nederland woont kun je mijn boek hier bestellen. Woon je in het buitenland, kijk dan even op het kaartje op deze pagina. Dan kun je zien waar je in het buitenland terecht kunt. Iedereen bedankt voor het meedoen en de felicitaties. Op naar de volgende tien jaar. :-)

So nice, all the birthday wishes I got because I was celebrating my blog anniversary of ten years. The giveaway of my book Crochet in the City was a huge success. The winners are now known: Sylvia Hummel, Jenneke van Maurik and Daphne Mols have won a copy of my book. On the photo above this post you see the Blue Violets Blanket. That is one of the patterns from the book. It's one of my favourite patterns from the book because I love the combination of the dark blue with the cheerful flowers. I made this blanket with Phildar Phil Coton 3. Would you like to read more about my book? Take a look here. If you live in the Netherlands you can order my book here. If you live abroad, take a look at the map at the bottom of this page. Then you can see where you can order the book from abroad. Thank you all for participating and the sweet messages. I'm looking forward to continue blogging the next ten years. :-)

Sunday, April 28, 2019

Ripple Blanket


Heb je naar de 'Freubeltalk' podcast geluisterd of gekeken naar het filmpje ervan op YouTube? Dan heb je deze deken langs zien komen. Het was een van de projecten waar ik nog mee bezig was en er moest nog het nodige aan gebeuren. Ik moest namelijk heel erg veel draadjes afhechten, en tot nu toe had ik daar niet echt zin in gehad. Maar gisteren heb ik een Afhechtdag ingelast. :-) Ik heb alle projecten afgehecht die ik nog had liggen. Nou ja, alle... ik was net klaar en wilde opruimen toen ik nóg een project tegenkwam waar het nodige aan moet gebeuren. Daarover binnenkort meer. Voor nu ben ik in elk geval blij dat deze eindelijk af is. Het patroon is trouwens van Attic24, ik haakte de deken met Drops Paris van Garnstudio. Wil je liever een ander garen gebruiken? Dan is Paintbox Yarns Cotton Aran een goed alternatief. Een fijne dag gewenst!

Did you listen to the 'Freubeltalk' podcast or did you watch the movie on YouTube? Then you have probably seen this blanket or heard me talk about it because it needed some TLC. I had to work away a lot of yarn ends, and so far I had not really felt like it. But yesterday I organised a Work Away Yarn Ends Day for myself. :-) I finished all projects that had yarn ends. Oh, did I say 'all projects'? ... I had just finished this one and wanted to clean up when I came across another project that needed to be done. But I'll tell you more about that soon. At least for now I'm glad that this one is finally finished. The pattern is from Attic24, I've used Drops Paris by Garnstudio for this blanket. If you want to try a different yarn, Paintbox Yarns Cotton Aran is a great alternative. Have a nice day!

Monday, February 11, 2019

New Ripple Blanket


Ik ben begonnen aan een nieuwe deken, en alhoewel ik het altijd heel fijn vindt om met heel veel kleurtjes te werken is het halverwege ook altijd even slikken als ik zie hoeveel draden ik weg moet werken als ik eenmaal klaar ben. Maar ook dat gaat wel weer lukken, want ik weet dat ik er altijd erg naar uit kijk om de deken af te maken als het einde in zicht is.
Deze deken heet trouwens de Ripple Blanket en ik haakte deze deken een tijd geleden ook al. Je kunt de link naar het patroon vinden in dit blogbericht. Inmiddels ben ik aan de rand begonnen dus het schiet al aardig op. Ik haak de deken van restjes Drops Paris en een haaknaald 5mm. Een mooi alternatief voor dit garen is Paintbox Yarns Cotton Aran.
Het haken met een 5mm haaknaald is trouwens wel even wennen nu ik heel lang met een haaknaald 3mm heb gewerkt. Het fijne is dat het heel snel gaat dus de deken is gelukkig af voordat het lente wordt.

I started working on a new blanket, and even though I love to work with many colors I'm also a bit terrified when I look at all these yarn ends that I need to fasten off one day. But I'm sure I'll manage that in a short period of time because I know that the closer I get to the end, the more I look forward to getting this blanket finished.
This blanket is called the Ripple Blanket. I made this blanket before, you can find the link to the pattern in this blog post. I'm already working on the edging so it's going pretty fast. I'm using Drops Paris cotton and a crochet hook size 5mm. A great alternative yarn is Paintbox Yarns Cotton Aran.
Working with a size 5mm is a bit different then the 3mm hook I've used for a long time now. I love how quickly this blanket is growing, and it is also good to know that it will be finished before it's Spring.

Sunday, January 20, 2019

Crochet Baby Blanket Tutorial


Vorige week begon ik aan dit dekentje en schreef er toen dit blogbericht over. Inmiddels is het af en omdat het een leuk en eenvoudig motiefje is leek het me leuk om het patroon uit te schrijven. Je vindt het hieronder. Ik haakte dit dekentje met Paintbox Cotton DK (van de kleuren Marine Blue, Red Wine, Blood Orange, Daffodil Yellow, Bubblegum Pink en Bright Peach 1 bol) en een haaknaald 4mm. Het dekentje is 55 x 62 cm lang maar het formaat is eenvoudig aan te passen. Let op dat je dan wel meer garen nodig hebt. Het patroontje vind je hieronder. Veel haakplezier gewenst!

Last week I started working on a new blanket and I wrote this blog post about it. Today I finished it and because it is a fun and easy pattern I thought it would be nice to write it down and share it. Youc an find it below the Dutch pattern at the bottom of this post. I made this blanket with Paintbox Cotton DK (1 ball of the colors Marine Blue, Red Wine, Blood Orange, Daffodil Yellow, Bubblegum Pink and Bright Peach) and a crochet hook size 4mm. The size of the blanket is 55 x 62 cm and can be adjusted easily but then you will need more yarn. Scroll down to see the pattern. Happy crocheting!

Algemene opmerkingen
- Aan het begin van elke rij bestaat het eerste stokje uit 2 lossen. Je haakt het daaropvolgende stokje in het tweede stokje van de onderliggende toer, dus niet in het eerste stokje.
- Als je het dekentje breder wilt maken, bedenk dan dat het gedeelte waar een figuurtje in zit bestaat uit 11 stokjes + 5 stokjes. Wil je dus dat je deken breder wordt, haak dan een veelvoud van 16 lossen extra in de begintoer.
- De toer waarin het figuurtje gehaakt wordt begint met vier stokjes. Die tellen niet mee als stokje voor het figuur. Tussen de figuren zitten 5 stokjes.
- Het blok waar het figuurtje in zit bestaat uit elf stokjes waarbij de onderste opening in het zesde stokje zit. Dus bij een figuur van elf stokjes haak je in de eerste toer 5 stokjes, 1 losse, sla 1 stokje van de onderliggende rij over, haak dan nog 5 stokjes. In totaal zijn dat er elf. Zoals hiervoor al is vermeld zitten er tussen de blokken met figuurtjes 5 stokjes dus haak nog 5 stokjes voordat je weer aan de elf stokjes van het volgende blok begint.

Patroon deken
1. Haak 84 lossen, keer je werk, haak 1 stokje in de derde losse vanaf de naald, haak nog 82 stokjes.
In totaal bestaat de eerste toer uit 83 stokjes. Keer je werk.
2. Haak 2 lossen, haak 1 stokje in het tweede stokje van de vorige toer en in alle andere stokjes van die toer. Keer je werk.
3. Haak 2 lossen, haak 3 stokjes. * Haak 5 stokjes, haak 1 losse, sla een stokje over, haak 10 stokjes. * Herhaal dit nog drie keer. Haak dan 5 stokjes, haak 1 losse, sla een stokje over, haak nog 9 stokjes. Je hebt nu het einde van de toer bereikt. Keer je werk.
4. Haak 2 lossen, haak 3 stokjes. * Haak 3 stokjes, haak 1 losse, sla een stokje over, haak 1 stokje in het volgende stokje, haak 1 stokje in de onderliggende opening, haak 1 stokje in het volgende stokje, haak 1 losse, sla een stokje over, haak 8 stokjes. * Herhaal dit nog drie keer. Haak dan 3 stokjes, haak 1 losse, sla een stokje over, haak 1 stokje in het volgende stokje, haak 1 stokje in de onderliggende opening, haak 1 stokje in het volgende stokje, haak 1 losse, sla een stokje over, haak 7 stokjes. Je hebt nu het einde van de toer bereikt. Keer je werk.
5. Herhaal nu toer 3. Het verschil met toer 2 is dat je nu sommige stokjes in de openingen haakt van de lossen die je haakte in de vorige toer. Die kom je vanzelf tegen. Keer aan het einde van de toer je werk.
6-8. Haak 2 lossen, haak in elke steek een stokje. Aan het einde van de achtste toer wissel je van kleur. Maak in totaal 7 banen.

De rand
Als je zeven banen hebt gehaakt ga je langs de zijkant een rand haken. Wissel daarvoor van kleur voordat je aan de rand begint. De rand haak je als volgt: rondom elk stokje haak je twee steken in de volgende volgorde:
1. 1 vaste + 1 half stokje
2. 2 stokjes
3. 2 stokjes,
4. 1 half stokje + 1 vaste.
Dit herhaal je totdat je aan de onderkant aangekomen bent. Haak dan een losse, draai je werk een kwartslag en haak in de onderste rand een toer vasten. Aan het einde van de toer haak je weer een losse. Haak dan opnieuw toer 1 t/m 4 van de rand totdat je weer bovenaan gekomen bent. Haak in de bovenste rand ook vasten of maak weer golfjes door achter elkaar het volgende te haken en te herhalen: 1 vaste, 1 half stokje, 1 stokje, 1 stokje, 1 half stokje, 1 vaste. Let op dat de bovenste rand uit 83 vaste bestaat dus als je telkens zes steken herhaalt kom je niet uit, maar als je dat niet erg vindt kun je het dus zo doen.

General remarks 
- My patterns are written in US terms.
- At the beginning of each row the first double crochet consists of 2 chain stitches. The first double crochet you make goes into the second double crochet of the previous row, so not in the first double crochet.
- If you want to make the blanket wider, remember that the part that contains a figure consists of a block of 11 double crochet + 5 double crochet. So if you want your blanket to be wider, then chain a multiple of 16 extra in the first row of chain stitches.
- The row in which you start making the figure starts with 4 double crochet. These 4 double crochet don't count as stitches for the block that contains the figure. In between the figures are 5 sticks.
- The block containing the figure consists of eleven double crochet stitches. The lowest opening is made in the sixth stitch. So with a figure of eleven double crochet you hook 5 double crochet in the first row, chain 1, skip 1 double crochet of the row below, then make another 5 double crochet. In total there are now eleven double crochet. As mentioned before, there are 5 double crochet between the blocks with figures, so make another 5 double crochet before you start working again on the eleven stitches of the next block.

Pattern blanket
1. Chain 84, turn, make 1 double crochet in the third chain from your hook, make another 82 double crochet. The first row contains 83 double crochet stitches. Turn your work. 
2. Chain 2, make 1 double crochet in the second double crochet of the previous row and make double crochet stitches in every other stitch of this row. Turn your work. 
3. Chain 2, make 3 double crochet stitches. * Make 5 double crochet, chain 1, skip a stitch, make 10 double crochet. * Repeat 3 more times. Make 5 double crochet, chain 1, skip a stitch, make 9 double crochet. You've now reached the end of the row, turn your work.
4. Chain 2, make 3 double crochet. * Make 3 double crochet, chain 1, skip a stitch, 1 double crochet in the next double crochet, 1 double crochet in the chain-1-opening below, 1 double crochet in the next double crochet, chain 1, skip a stitch, 8 double crochet. * Repeat 3 more times. 
Make 3 double crochet, chain 1, skip a stitch, 1 double crochet in the next stitch, 1 double crochet in the chain-1-opening below, 1 double crochet in the next double crochet, chain 1, skip a stitch, make 7 double crochet. You've now reached the end of the row, turn your work. 
5. Repeat row 3. The difference with row 2 is that some of the double crochet stitches in this row have to be made in the chain-1-openings of the previouw row. You will see it when you get there. Turn at the end of the row. 
6-8. Chain 2, do 1 double crochet in each row. At the end of the 8th row: change color. Make 7 rows in total.

The edge
When you have crocheted seven rows in different colors you will now start working on the edge. Change color before you start working on the edge. Make the edge as follows: make two stitches around each double crochet in the following order:
1. 1 single crochet + 1 half double crochet
2. 2 double crochet
3. 2 double crochet
4. 1 half double crochet + 1 double crochet.
Repeat this until you reach the bottom. Chain 1 and turn your work a quarter. Now make 1 single crochet in each chain stitch of the first row. At the end of the row: chain 1 and repeat rows 1-4 of the edge until you reach the top of the blanket. You can make single crochet stitches in the stitches of the top row but you can also make little bows by repeating this: 1 single crochet, 1 half double crochet, 1 double crochet, 1 double crochet, 1 half double crochet, 1 single crochet. Please note that the top row consists of 83 stitches so if you repeat six stitches each time you will not end with a single crochet, but if you don't mind this is a nice edge for the top row.

Sunday, January 13, 2019

Paintbox Blanket


Die lange donkere grijze dagen, ik vind het maar niks. Van mij mag het zonnetje wel weer eens tevoorschijn komen en daarom ben ik aan een heel zonnig dekentje begonnen. Eentje met vrolijke kleurtjes. Ik gebruik voor dit dekentje Paintbox Cotton DK en een haaknaald 4mm. Het haakt lekker snel weg en het kleine patroontje in de deken geeft het wat afwisseling. Ik zal een werkbeschrijving op mijn blog zetten zodra het dekentje af is.

These long dark grey days, I don't like them at all. If you ask me the sun may return quickly and that's why I started this sunny blanket. A blanket with happy bright colors made of Paintbox Cotton DK and a crochet hook size 4mm. It's a really quick project to make and I used a little filet crochet pattern as alternation. Once the blanket is all done I'll post a tutorial on my blog. 

Sunday, December 2, 2018

Sunburst Blanket


Hij lag echt zo lang in de kast, ik weet eigelijk niet eens meer wanneer ik precies aan deze deken begonnen ben. Toen ik op een gegeven moment verder wilde gaan waren er zoveel draadjes om af te hechten dat de moed me telkens weer in de schoenen zonk. Maar zo af en toe werkte ik een paar draadjes weg en langzaam maar zeker verdwenen ze allemaal en gisteren heb ik dan eindelijk de rand kunnen haken. De deken is niet heel erg groot (72 x 130 cm), maar omdat hij eigenlijk al ingepikt was door mijn kat maakt dat niet zoveel uit. Ik kan 'm nu in haar mand leggen. Ik haakte de deken met Drops Paris katoen en een haaknaald 5mm. Wil je een ander garen gebruiken? Dan kun je bijvoorbeeld Paintbox Yarns Cotton Aran gebruiken. Het patroonje van de square vind je hier. Een fijne dag toegewenst!

It was in my closet for so long that I don't even remember when I first started working on this blanket. At some point I tried to finish it but there was so many yarn to fasten off that I just couldn't get myself to do it. But every now and then I worked away some yarn ends, so they all disappeared one by one. And yesterday I finally got to make the red edging. De blanket is not very large (72 x 130 cm) but that's not too bad as my cat already claimed this blanket. I will put it in her basket so she can sleep on it. I made this blanket with Drops Paris coton and a crochet hook size 5mm. If you want to try another yarn that's similar you can try Paintbox Yarns Cotton Aran. The pattern of this square is here. Have a lovely day!

Sunday, August 5, 2018

New granny square blanket


Het is weer hartstikke warm buiten dus het maken van deze deken gaat niet zo heel erg snel. Ik ben begonnen met een grote granny square (klik hier voor het patroon). Toen de breedte goed was ben ik aan een van de zijkanten verder gegaan zoals je een Granny Stripe deken haakt. Zo wordt de deken alsnog rechthoekig. Ik wissel elke rij van kleur, dus het afhechten zal nog wel een aardig klusje worden. Ik gebruik restjes Phildar Phil Coton 3 en een haaknaald 3mm. Het zou leuk zijn als deken in de herfst af is, maar als het weer zo mooi blijft zal het nog spannend worden of dat lukt. Weet je niet hoe je een granny square haakt en wil je dat leren? Klik dan hier voor een blogbericht met een patroon en een uitleg met foto's. Een fijne zondag gewenst!

And again it's very hot outside, so the making of this blanket goes very slowly. For this blanket I made a very large granny square (click here for the pattern). When the width of the blanket was right, I continued on one of the sides with the pattern of a Granny Stripe blanket. This way the blanket will become a rectangle. I change color every single row, so working away yarn ends will take some time.
I'm using Phildar Phil Coton 3 and a crochet hook size 3mm. It would be nice if the blanket is finished when fall starts, but if the weather continues to be as nice as it is right now, I'm not sure if I'll manage. If you don't know how to make a granny square, click here for a blog post with a pattern and a photo tutorial. Have a lovely Sunday!

Sunday, March 18, 2018

Sunburst blanket


Deze deken had ik al heel lang in de kast liggen. Tijdens het maken van mijn nieuwe boek (het zal in mei uitkomen) kwam het er natuurlijk helemaal niet van om hem af te maken. De squares verdwenen helemaal achterin de kast, want er kwamen heel veel andere bolletjes wol binnen die allemaal een plekje nodig hadden. En als je denkt dat het maken van een boek heel georganiseerd kan, dan zal ik je zeggen dat in mijn geval het tegenovergestelde waar was. Overal lagen bolletjes wol, en pas toen de fotografie er op zat had ik eindelijk tijd om de boel een beetje aan kant te maken. En toen kwamen de squares van deze deken opeens tevoorschijn. Ik ben er meteen mee aan de slag gegaan en het is ontzettend leuk om te doen. Als de deken af is zal ik het patroon op mijn blog zetten.

This blanket was in the closet for a long time. During the making of my new book (it will be available in May) I didn't have the time to finish it. In fact, the squares ended up in the back of the closet because more and more yarn arrived and all those balls needed a place to stay. And if you think that making a book can be a very organised project, I can tell you that in my case this is very untrue. There was yarn everywhere, and only when the photography was done I had time to clear up the mess. And that's when the squares for this blanket appeared. I immediately started working on it is such a fun project. I'll write down the pattern of this blanket as soon as it is done.

Friday, June 2, 2017

Vakantie


Ik heb een weekje vakantie en kom nu al weer tijd te kort. Bij het opruimen van mijn kast kwam ik deze onafgemaakte deken tegen. Ik moet er gauw mee verder, maar tegelijkertijd is het weer ook zo mooi, dus even een stukje fietsen door het natuurgebied bij mij in de buurt is nu ook heel fijn. Nou, gelukkig duurt de vakantie nog een paar dagen dus ik heb nog wel even de tijd. Een fijne dag vandaag!

I'm having a week off from work and I'm already in need of more days off. While going through my yarn stash I found this unfinished blanket. I really want to finish it, but at the same time the weather is lovely and I would love to take my bicycle and cycle a little through the woods near my house. Well, luckily I still have a few days to go. Have a lovely day!